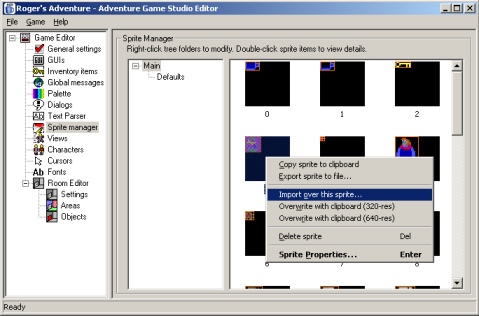
I'm about to overwrite sprite slot 3
When you were choosing the graphics for the object earlier in this tutorial, you probably noticed that the graphics available didn't look up to much. This is no problem, because you can import your own graphics using the Sprite Manager.
Select the "Sprite manager" in the left-hand tree. Here you will see the complete sprite set for the game.
AGS uses sprites for all game graphics, except room backgrounds. The Sprite Manager is the central place where you do all your graphics importing. Whenever you want to use images in the game (eg. for mouse cursors, characters, objects, and so forth), you select an image to use from here.
There are two ways to import your graphics - either overwrite an existing slot with your graphic, or create a new slot for it. To overwrite an existing sprite, right-click the sprite and select "Import over this sprite". To import a new slot, right-click on the background of the window and choose "Import new sprite".
I'm about to overwrite sprite slot 3
When you select this menu option, the Import Image window will pop up:
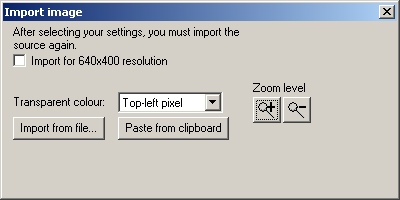
The "Import Image" window
The first thing to do is to set what resolution the image is drawn for. Basically, if you are making a 640x480 game, you need to check the "Import for 640x400 resolution" box before going any further. If you are making a 320x200 game, leave it unchecked.
Now, you can either:
The sprite graphics you import must be the same colour depth as your backgrounds - ie. if you have a 256-colour game, you must import 256-colour sprites.
Ok, so I didn't have any decent sprite graphics on my disk.
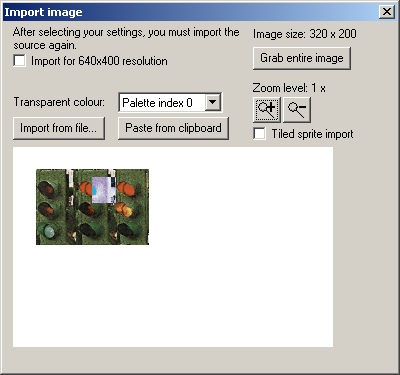
Now, the
image should be displayed. You may get scroll bars if it's larger than the
window can handle. You'll notice that a new button, "Grab entire
image" has appeared.
|
|
NOTE (256-colour only): You may well find that the colours on your graphic look slightly strange in the Room Editor. This is because by default only the first 41 of the palette colours are allocated to sprites, so your graphic will be remapped to this much smaller palette. If you find that many of your imported sprites look strange, you can increase the number of colours assigned to sprites, at the expense of background colours (see the earlier part of the tutorial for palette setup). |
Move the mouse cursor over the image, and you'll see a rectangle following the cursor around. This is the selection rectangle that determines what portion of the image will be imported. Click and drag the right mouse button to resize it.
If you just want to import the entire image as your sprite, simply click the "Grab entire image" button. Otherwise, move and size the selection rectangle so that it covers what you want to import, and click the left mouse button. The "Zoom out" and "Zoom in" buttons allow you to zoom in on the sprite to see more detail if you need to precisely align your import rectangle.
NOTE: For character graphics, make sure you import graphics that are a suitable size for the game backgrounds. For example, don't import a 320x200-sized image for your character, since it will take up the whole screen. A good size would be about 20x50 pixels.
This feature allows you to import a grid of sprites into seperate slots - for example, if you have several frames of a character animation side by side in the source bitmap. To do this, simply check the "Tiled sprite import" box, and align your rectangle on the top left sprite. When you click the left mouse button, you will get an extra step which allows you to size the grid:
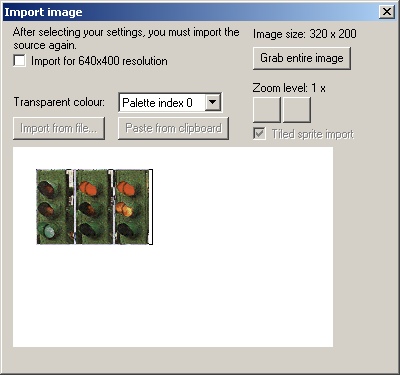
I've sized a 3x1 grid, to import each traffic light seperately
Click the left button again once you are happy with the grid. Each of the cells will be imported as a seperate sprite.
For full details on importing sprites, see the manual "Importing your own sprite graphics" section.
Go to part 7: Animations
Tutorial last updated 20 December 2002. Copyright (c) 2001-2002 Chris Jones.